Showing posts with label Recipes. Show all posts

Saturday, February 8, 2020

Sourdough: How to Get Started

Sourdough Starter


My sourdough adventure started with a request from my husband for a thick, crusty bread to eat with soup. I quickly got discouraged while looking for recipes online. All the recipes seemed so complicated, and the sourdough community seemed a bit snooty and confusing. 🙂 They all used special flours and terms I didn’t understand, and made it sound like keeping your sourdough alive was a tricky business and required a lot of attention.  

A friend of ours gave us some sourdough starter, and I found a recipe that had a lot of pictures and made some sense to me. And guess what? It worked! I made a beautiful loaf of thick, crusty bread that tasted amazing too! Using just white flour, water and salt!

Sourdough is good for so many recipes: breads, pretzels, pancakes, English muffins, etc. And did you know that even if you’re gluten-free you may be able to eat sourdough bread? The carbohydrates and proteins in the wheat get broken down and made easier to digest. 

I have come to realize that there is a lot of wiggle room with the sourdough recipes and how you handle the starter. It’s actually pretty low maintenance and doesn’t have to be treated with precision.  You do have to plan ahead for many of these recipes, but it’s definitely worth it!

So now you probably want to eat some sourdough, but maybe you don’t have a friend to share a starter with you. Start your own! This recipe uses simple ingredients, and only takes 5-7 days to start, and you only need to feed it once a week! 

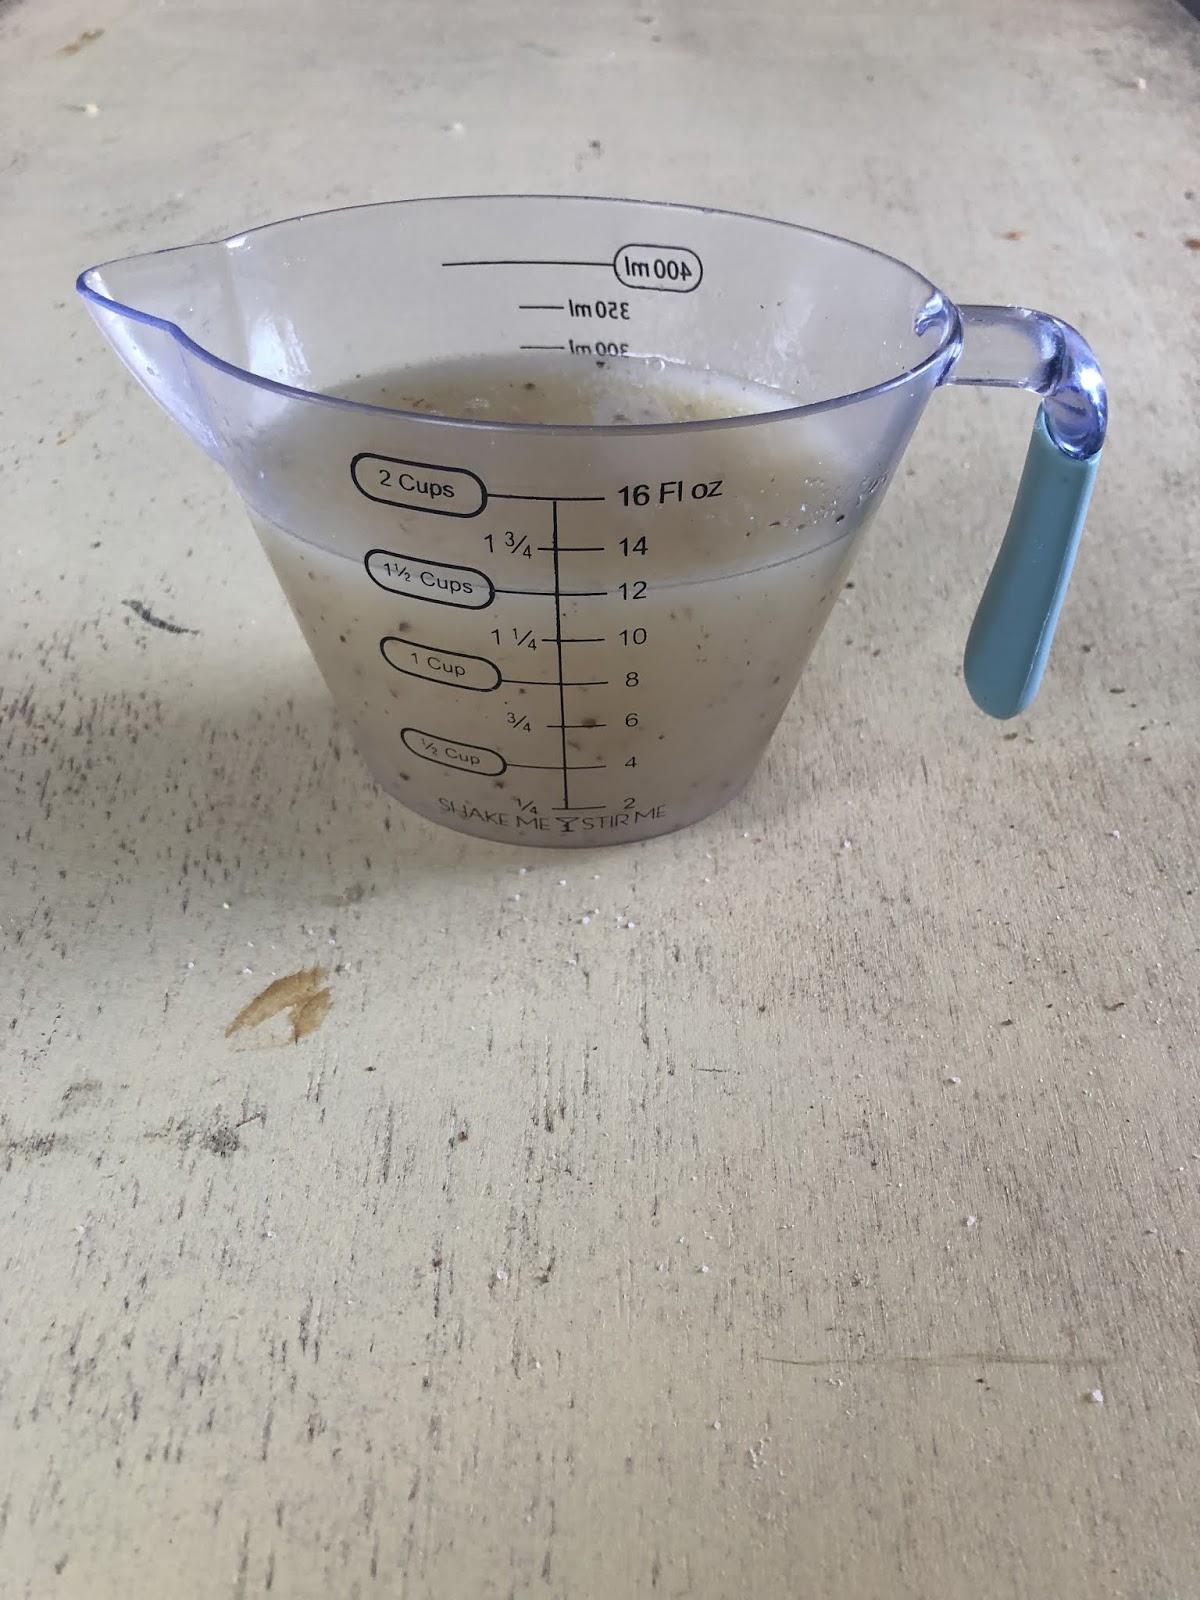
To make a sourdough starter, start with a large jar or container. Take 1/4c of water and 1/4c + 2tbsp of flour, and mix it well. Cover it with a tea towel or cheesecloth and let it sit in a warm-ish place (the top of the fridge is a great place). Every 24 hours, add another 1/4c water and 1/4c flour. Continue to do this for 5-7 days, until a small spoonful of your starter floats in a cup of water. 

If you are having trouble getting your starter going, try feeding it every 12 hours instead. 

Once your starter passes the float test, it is ready! Use some now to make some delicious bread or pancakes, and put the rest in the fridge. 

Each time you use your starter, take it out of the fridge and feed it. Aim for at least once a week (but I’ve let mine go almost 2 weeks before 😬).  I take my starter out, pour half into a bowl. I add 1/2c water and 1/2c of flour to the bowl and let it sit until it’s ready to make bread, and then I add 1/2c water and 1/2c flour to the jar and put it back in the fridge. 

If your starter gets a brown liquid on top, that’s means it’s hungry! I usually pour that liquid off the top before I feed the starter again. 

So go mix up a starter and let it start the souring process! Over the next few weeks we will be sharing some of our favorite sourdough recipes! 

-Kayleigh 

Thursday, August 1, 2019

Vanilla Wafers

Vanilla Wafers 
One of my mom's most favorite desserts calls for Vanilla Wafers....however, those are not available in the jungles of Papua New Guinea. One of my favorite chefs is Alton Brown and this is his recipe. I've tried making these with margarine, and they weren't sturdy, they flattened out, and they were more like a sugar cookie than a vanilla wafer. 


Cream the sugar and butter together, then add egg, vanilla, and milk. Combine flour, baking powder, and salt. Slowly add flour mixture to the butter. Once completely combined, chill dough for 15-20 minutes. Scoop batter by the teaspoon full onto a cookie sheet. Roll the dough into an even ball, and then gently squash the ball against the cookie sheet with the palm of your hand. Bake in a 350° oven until the edges of the cookies start to brown. 

Amber Wells 
Papua New Guinea 

Thursday, July 25, 2019

Easy Marinade & Kabobs

My husband and I got a grill this year as a joint Mothers Day and Fathers Day gift! The very first thing we grilled was kabobs! It’s one of our family’s favorite meals. It’s easy, delicious, healthy, and easy to customize to whoever is at the table. I just chop up a bunch of vegetables and meat, and then everyone gets to assemble their own kabobs.

What really makes the veggies shine, though, is this marinade! It brings such a bright, fresh flavor that works with anything and everything! And it’s SO simple. 


Kabobs are a fantastic way to feed a group of people, especially when you’re not sure of everyone’s food preferences. We have fed many groups of people using this recipe, including vegans, vegetarians, and people who hate vegetables. 😉


Meats we have used for kabobs: chicken, beef, pork, bacon
Vegetables we have used: zucchini (my favorite!), summer squash, onions, peppers, tomatoes, potatoes (boil them for a few minutes first!), mushrooms, pineapple

Chicken grilled with this marinade is also fantastic shredded over a garden salad, or tossed into a Italian pasta salad!

I have never had any "fails" or regrets when using this marinade (except wishing I had made just one more kabob.... 😀) It's a crowd pleaser!


-Kayleigh Dye

Tuesday, July 16, 2019

BBQ Sauce

BBQ Sauce 

BBQ sauce is one of those things that people miss while on the field. We all have that one sauce that the whole family loves! However, most fields probably do not have your family's favorite sauce. Here is a BBQ Sauce base for you to tweak to your family's taste. 


Mix ingredients in a bottle, or a bowl. If you like a sweeter sauce, add more sugar or honey, spicy, add chili flakes, vinegar, add vinegar. We change this sauce up depending on what we have barbequed that day. We also like to keep a bottle of the base in the fridge for my brothers. They like to dump this stuff on rice or random leftovers on leftover day.

 Whether you use this BBQ Sauce as a base, or you use it as is, I hope you enjoy this recipe.

Amber Wells
Papua New Guinea
🇵🇬

Tuesday, July 9, 2019

Marshmallows


One of my favorite parts of 4th of July is sitting around a bonfire, roasting marshmallows for s’mores! 

Graham crackers and marshmallows aren’t exactly common items here in PNG, so we decided to make our own! Amber made some delicious graham crackers (I’m sure there will be a post on those in the future), I whipped up some marshmallows, and we all enjoyed our s’mores! Everyone agreed, these taste just as good (if not better!) than storebought marshmallows. 


Marshmallows always seemed like an intimidating recipe to me. The first time i tried them, i was surprised when they actually turned out right! They are actually quite simple, as long as you know a few tips and tricks. 


These marshmallows don’t toast quite the same as storebought. They melt faster, and caramelize quickly. But they don’t catch on fire as quickly as storebought! Also, these are just as delicious toasted over the stove, if you don’t have a fire pit outside.

I haven't tried these marshmallows in any other recipes yet (such as rice-krispie treats or marshmallow fondant, but it's on my to-do list!). 

Enjoy!

-Kayleigh


Tuesday, July 2, 2019

Freezy Pops

Freezy Pops

What is more enjoyable than a stick of something cold, refreshing, and sweet on a hot day?


Not a whole lot! 

We have been making these for our Sunday school class the last few weeks. The kids love them! We make simple cordial Freezy Pops for them, but thought maybe we could make some that were more of a snack than just a drink. 

Here are a few of the flavours we have come up with. 


With the first three of these all you do is blend the ingredients until smooth. If the recipe calls for milk, add milk till mixture is pourable. 


Pour yogurt (already sweetened with honey)  and jam into Freezy Pop bag by the spoonful for a more swirled look. If you don't care about the swirl, just mix the ingredients together and pour into Freezy Pop bags. 


Just follow the custard instructions to make the custard Freezy Pops. Allow the custard to cool before you pour into Freezy Pop bags. 

If you do not have the right ice pops bags, you can make your own using a zip- top bag, rubber bands and skewers. 


We hope you guys enjoy these! 
Let us know what you think! 

Amber Wells & Kayleigh Dye 
🇵🇬

Tuesday, June 25, 2019

Chocolate Cake

Homemade chocolate cake is hard to make. 
I mean it isn't really, but it's hard to find a recipe that is moist, flavorful, not tough, but not crumbly. 
I'm normally not even a cake fan, but I love this cake. I like to eat it without frosting, just pure chocolate cake! 

I got this recipe from a missionary here in PNG, and she got it from her mother, who got it from a magazine...so if you're reading this recipe, and it's your recipe, I thank you for putting this delicious recipe in a magazine many years ago! 


Mix dry ingredients, then wet. Combine ingredients, and beat for 3 minutes. 

Pour into a greased and floured 9" pan or into cupcake cups.  Bake in a 325° oven for 25-30 minutes or until toothpick comes out clean when inserted into the center. 

I honestly believe the secret to this cake's moistness, richness, and over all deliciousness is the coffee. I've tried making it with just water, or milk, or even hot water, and it just isn't the same. 

One thing I did learn last time I made this recipe is that the batter must be baked immediately. My oven was full, and I wasn't able to bake my cupcakes immediately. The cupcakes still tasted great, but the cake was a bit crumbly, and would not have been firm enough to frost. I am not sure why this is the case. If you know why, let me know, please!


Amber Wells
Papua New Guinea
🇵🇬

Tuesday, June 18, 2019

Olive Garden Salad Dressing


Olive Garden salad.... why is it so delicious? It’s pretty simple as far as salads go: no fancy lettuce or exciting toppings. But that dressing sends it over the top!

I made this dressing all the time (until we started deputation, and then I found out Olive Garden sold the dressing at Walmart. We always had a bottle in our RV fridge 🙂). Now that we are in PNG with no Walmarts around, this recipe is quickly becoming a favorite again. 


This recipe is so easy! Just throw everything in a blender until the dressing is smooth and combined. It is also very easy to adjust to your tastes. If you like it a little thinner, add more oil. If you want it a little less tangy, reduce the vinegar by a tablespoon or two.  The dressing can be stored in the fridge for about 10 days. 

If you can’t find mayonnaise or corn syrup where you are, make your own! There is a recipe for mayonnaise on this blog already, and we have plans to do more “staples” and substitutes for ingredients (including corn syrup) here soon! In the meantime, you can use honey as a corn syrup substitute in this recipe. 


Stay tuned for more delicious copycat recipes. Let us know if there is a specific copycat recipe you’d like us to work on!

- Kayleigh Dye

Tuesday, June 11, 2019

Fajita Seasoning Mix

When I first started to cook, my parents gave me a day of the week to make dinner. That day was all on me, I could make whatever I wanted! Every single Tuesday I would get all excited and go through all of our cookbooks looking for a tasty new recipe to make. 

However 
I never made any of those. Why? Cause I was on Fajita kick. I made fajitas every single Tuesday for a couple of months. I loved them so much! I would roll out my tortillas, slice up the onions and bell peppers, and mix up a recipe of Fajita Seasoning Mix. A friend of ours from Montana had given us the recipe when we were on deputation, and I thought it tasted so much better than  the seasoning packets from the store. Plus, I'm a snob and I don't like using seasoning packets. 😬


Use this Fajita Seasoning to your own taste. Some like to add a lot, some like to add a little. It depends on what you're wanting. Normally one recipe makes 2-3 meals for my family of seven. 

I am so thankful my family didn't complain about eating the same meal every week! I still love Fajitas, but have learned that variety is a good thing. Right around the time I learned that my mom gave me more nights to make dinner.....hmmmm, maybe they were afraid I was gonna make fajitas several times a week!


Fajitas are a great low carb meal - you don't have to serve them on tortillas. Sometimes we just make the bell peppers, onions, and beef mix and then make a fajita salad out of it. We'll put salsa, or guacamole, or sour cream, or cheese, or all that! It makes a delicious salad! 

Fajitas can also be a great keto meal. Lower the amounts of bell peppers, onions, and salsa, and just up the amounts of guacamole, sour cream and cheese! 

We make this more when we first get back from town and have fresh veggies to make the salsa, and guacamole. 

You can also make your own sour cream by just adding a tablespoon of lemon juice or apple cider vinegar (white or brown work too, but we get better results with acv) to a cup of full cream. We can't always get fresh cream here. Sometimes all that is available is shelf stable box cream. If you only have the shelf stable cream make sure you chill it before making it into sour cream. If the cream doesn't thicken, try adding a teaspoon more of vinegar. Chill and stir before serving.

I love making my own seasoning mixes because I know exactly what is in them. We do have some allergies in my family, so I don't have to worry about "small traces of" or the ingredients I can't pronounce or have no idea what they mean! 


Monday, April 2, 2018

Thai Stir-fry


สวัสดีทุกคนค่ะ  Hello everyone from hot and dry Thailand!  We are in the midst of hot season right now and we are fryin.'  You may not be able to roast to the same degree that we are, but you can have a taste of the Thai hot season from wherever you are.  This is the recipe for ผัดเปรี้ยวหวาน.  In other words, "Pad bpriao waan" or Sweet and Sour Stir-fry.


First, mix all the ingredients for the sauce together in a saucepan and bring to a boil.  Set aside.


Deep-fry the chicken in batches and then keep it hot in the oven.


Pour about a tablespoon of oil on the bottom of a frying pan.  Layer the onion on the bottom of the pan, and then the peppers.  Fry until the onions are almost clear.  Then, stir the vegetables up to let the peppers get just a little bit of heat.  We want them to stay crunchy.


While the onions and peppers are frying, add a little bit of oil to the bottom of a pan and stir fry the pineapple just until the juice starts to run.  We don't want mush - just softened.


As soon as the fruit and veggies are done, layer them on a large serving tray.  Quickly whip out your chicken, and chop it into strips.  Place the chicken on top of the pineapple and pepper mixture.  Then drizzle your sauce over top of the whole mess.  Serve right away while the chicken is still nice and crunchy.


อร่อยจริงๆ Delicious!

Other vegetables can be used in place of the peppers.  Thais like to add cucumbers, small corn cobs, and extra various and sundry hot peppers.


Tuesday, March 27, 2018

Grjónagraut


Snúður and Coffee
When my husband and I moved to Iceland, we were introduced to some new foods.  Most of them are amazing.  If you visit, you must stop at the bakery to buy a snúður (a giant cinnamon roll) or a kleina (a twisted, deep-fried donut). Icelandic pylsur (hot dogs) and skyr (a thick yogurt) have been gaining international attention because they are so good. 
Kleinur
Other foods, though, I find just gross, to tell the truth.  Hákarl (rank, fermented shark) for one, is simply too disgusting for me to swallow.  For a team challenge at summer camp one year, I tried to swallow the same piece three times.  Yes, that was three times. The stubborn thing just wouldn’t go down.  After my third attempt, I got sympathy points for my team.  Thankfully, most foods taste better than smelly shark.
Icelandic Grjónagraut (rice porridge) is a favorite meal at our house and church. This budget-friendly, simple hot cereal is a great warm breakfast on a cold winter´s morning, a hearty after-school snack, or a sweet treat for supper when the coffers are low at the end of the month. It is neither low-fat nor low-carb, yet somehow no one complains when it is served. One of my sons prefers his cold the next day. Morning or evening, cold or hot, I hope your family enjoys this Icelandic dish.


Icelandic Grjónagraut

Rice Porridge

Ingredients:


2 cups water
pinch salt
1 cup dry rice
4 cups milk (Whole milk tastes the best, but any milk will work.)
1 teaspoon vanilla (Optional, but my kids like it better)
Cinnamon-sugar (a simple mix of a little cinnamon and a little more sugar)
Raisins (Stirred in the last few minutes or on the side dry)


Directions:


Place water and a pinch of salt into the pot.
Bring to a boil.
Add dry rice and cover.
Reduce heat to medium or medium-low.
Leave until most of the water is absorbed, about 15 minutes.
Add milk and vanilla.
Stir.
Reduce heat to low.
Cover and let sit about 20 minutes or until milk is heated through.
Serve with cinnamon-sugar and raisins.

Tips:


Use left over rice to make this the next morning. I just put it in a pot, cover it with milk, add a little vanilla, and heat it on medium-low while the kids get dressed.

Tuesday, March 31, 2015

Homemade Sloppy Joe Sauce

Convenience sometimes wins when it comes time to make a dinner meal. We just need something quick and easy that does not require lots of effort so that we can move on to the next task at hand. I actually accidentally created this recipe for homemade Sloppy Joes or Manwich sauce. I was taste testing another experimental recipe I was attempting and immediately I tasted the familiar flavor of Sloppy Joes! Thankfully, our kids love it and didn't remember the taste of the canned stuff. But really, it does taste just like it!


Homemade Sloppy Joe Sauce

Ingredients:
2 lbs. ground beef (browned)

Approx. 1 cup of ketchup

1/4 cup of tomato paste

black pepper

onion powder

salt

1-2 tsp. sugar to balance out the acidity of the tomato paste (add more or less if desired)

water


Directions:

Brown the ground beef in large skillet. Drain the beef. Return beef to skillet. On low-medium heat, add all remaining ingredients; adding enough water to reach desired consistency. Simmer on low heat for 5-10 minutes.

Once you have this basic recipe you can tweak it to your desired flavoring. The main thing is to keep the amount of ketchup to more than the tomato paste. 
Serve on bread or hamburger buns with chips.

Tuesday, February 24, 2015

Homemade Tortilla Chip Recipe


In checking with many missionary ladies around the globe, one staple in our pantries that can not always be purchased in stores is corn tortilla chips. But, where there's a will there's a way and one of our ladies who makes them regularly for her family shared her recipe with me so that I could share it on here with you!


INGREDIENTS:
130 g (1 cup) All-purpose (aka Plain) Flour
130 g (3/4 cup) Cornmeal (aka Polenta) - I use fine cornmeal. I think coarse would also work.
1/4 teaspoon Baking Powder
heaped 1/2 teaspoon Salt (adjust to personal liking)
generous dash cayenne pepper (or paprika or black pepper, if you can't handle a little heat)
120 ml (4 fl oz) Hot Water (not boiling)
10 g (2-3 teaspoon) Vegetable Oil


DIRECTIONS:
STEP 1 - MAKE THE DOUGH
Mix together the dry ingredients (flour, cornmeal, baking powder, salt, cayenne) in a frying pan or mixing bowl. I use a frying pan because it will be used to cook the tortillas later, so I thought might as well mix & knead the dough in it. Add the hot water and oil. Mix into a dough, first I use a spatula then switch to hands. This is a very easy dough to handle. It's not too sticky and not too crumbly. Knead for just one minute. Form a dough ball, coat with a little oil, cover with plastic wrap. Let it rest for 10-15 minutes.
STEP 2 - MAKE & COOK THE TORTILLAS
To keep my counter top easy to clean, I wet it slightly then lay down a piece of plastic wrap. The plastic clings onto the damp surface and stays in place.
Divide into six dough balls. Coat them with a little oil (residual oil from the pan). Give the pan a quick wipe and heat on the stove top over medium heat. Press out the first dough ball. I use my palms and fingers. You can use a rolling pin if you prefer. Press it out to about 18-20cm diameter and 1-1.5mm thick. Place in the heated pan and cook for about 2 minutes per side, until you get brown edges and spots. Place on a foil-lined baking tray. While one is cooking, I press out the next one.
STEP 3 - CRISP THE CHIPS
When I have finished cooking six tortillas, I break each up into 8 to 10 rustic-looking chips. If you want them neat, cut with kitchen scissors while warm.
Preheat the oven to 170C (330F) or, in an oven with a fan, to 150C (300F). Bake the tray of chips for 10-12 minutes.
They don't brown much more in the oven. To check that they're ready, find a thicker piece and eat it to find out! It should be crunchy and snappy and totally delicious. When they are completely cooled, store in a seal-able bag. They keep well for several days.


Hmm, I think it's time for a salsa recipe! I found one from another missionary wife on this blog! Here it is!

Tuesday, January 27, 2015

The Proof is in the Pudding! - Pudding Mix Recipes

Today, my thoughts and prayers are for, the missionary kid. What blessings they are! They love their unique lives on the mission field, for the most part, ;) but, every now and then they wish they could give a hug to a family member they left back "home" in the US, or enjoy a special treat like they had during their family's last furlough. One of those yummy treats our kids miss is pudding! I wanted to share several recipes for pudding that I was so excited to find upon first arriving on the field. Every now and then pudding is still a special treat for our family. All of these can be made ahead by combining the dry ingredients and storing them in an airtight container to be added to milk and cooked later. Hopefully, we can satisfy a craving for your favorite pudding with one of these recipes!


Vanilla Pudding Mix

3 cups nonfat dry milk (I use whatever dry milk I can find!)
4 cups sugar
1/2 tsp. nutmeg
1 tsp. salt
3 cups cornstarch
1/2 tsp. vanilla extract

Combine all ingredients except the vanilla and store in an airtight container until ready to make.
To prepare: Mix 1/2 cup of the dry mix to 2 cups of milk. Heat and stir constantly until the mixture comes to a boil. Cool, then add 1/2 tsp. vanilla extract. Serve.

Chocolate Pudding Mix

2 1/2 cups nonfat dry milk
5 cups sugar
3 cups cornstarch
1 tsp. salt
2 1/2 cups unsweetened cocoa

Combine all ingredients except the vanilla and store in an airtight container until ready to make.
To prepare: Mix 2/3 cup of the dry mix to 2 cups of milk. Heat and stir constantly until the mixture comes to a boil. Cool and serve.

Coconut Cream Pudding Mix

3 cups nonfat dry milk
4 cups sugar
1 tsp. salt
3 cups cornstarch
1 1/2 cups shredded unsweetened coconut
1 tsp. coconut extract (This is not available here for us so I substitute with vanilla extract)

Mix the extract and shredded coconut in a small bowl until the extract is absorbed. Add the coconut to the other ingredients and store in an airtight container until ready to make.
To prepare: Add 2/3 cup of the dry mix to 2 cups of milk. Heat and stir constantly until the mixture comes to a boil. Cool and serve.

Butterscotch Pudding Mix

2 cups nonfat dry milk
5 cups brown sugar, packed
1 tsp. salt
3 cups cornstarch

Combine all ingredients and store in an airtight container until ready to make.
To prepare: Add 1/2 cup of the dry mix to 2 cups of milk. Heat and stir constantly until the mixture comes to a boil. Cool, then serve.

Tuesday, January 13, 2015

Chicken Parmesan

So, is everyone as tired as I am with sweet desserts and candies after the holidays?! Although we have enjoyed the snacking and special treats at parties and gatherings this time of the year, our family is ready to return to a normal schedule with some more consistent meals. This Chicken Parmesan recipe is a great one to serve for your family or more company as it makes your house smell delicious! It is also pretty easy to prepare.

The left over butter is sprinkled on top to help crisp the chicken upon baking.


Ingredients:

2 cups dry bread crumbs
3/4 cup grated Parmesan cheese
1/4 cup dried parsley flakes
1/8 tsp. Pepper
1 tsp. Paprika
1 tsp. Oregano
2 Tbsp. Salt

Directions:

Mix above ingredients well and set aside. Melt 1 cup of butter (if unsalted butter is used, add a little salt for flavor). Dip chicken in melted butter then roll in crumb mixture until well coated. Arrange breaded pieces in shallow foil lined baking pan. Pour remaining butter over chicken. Bake in moderate oven (180 degrees Celsius) for 20-30 minutes until juices run clear and chicken is golden brown.

**I must note that normally when I make this dish for our family of five I use HALF of the recipe above. It makes quite a bit of breading, even enough for about a kilogram of skinless, boneless chicken breast. 

I serve this with pasta and some marinara sauce. Top with a little grated Parmesan cheese. Garlic bread on the side. Delicious!


Tuesday, December 16, 2014

Lemon Bar Recipe

As I sat down to write more pizza recipes to go with our pizza dough recipe from last week I remembered, it's the holidays! Time for the fattening stuff! Today I bring you the best tasting lemon bar recipe I have ever tasted, passed on to me by my mother-in-law. I, being a woman who loves all cherry flavored candy and desserts while not liking anything lemon flavored, married a man who loves anything lemon and doesn't care for much cherry flavored. So, when we married his mom made these lemon bars and I was told they were hubby's favorite dessert, I decided I needed to learn to make these. They are really good and would make a great addition to your Christmas cookie bar recipe list. They are moist, crispy, ooey, and gooey, all at the same time!


Crust Recipe
3/4 cup of powdered sugar
1 1/2 cup of softened margarine
3 cups of Flour - with an added sprinkle of salt

Mix together well and then flatten out into a 9x13" baking dish. Bake at 350 degrees F (175 C) for 20 minutes. Remove from oven.

Filling recipe:
3 cups of sugar
6 Tbsp. of flour
6 Large eggs (beaten well)
Rind of 2 lemons and their juice. Pour this mixture over warm baked crust. Return to oven and bake for 25 minutes more. Cool. Sprinkle with powdered sugar.

When completely cool, cut into small squares to serve.


Tuesday, December 2, 2014

Cracker Candy

Today I am sharing a recipe you definitely want to write down and add to your collection of holiday recipes!

If you love toffee, you will love Cracker Candy!


Ingredients

1 cup of real butter (no substitution)

1 cup brown sugar

Large package of chocolate chips (or on the mission field, I use chopped up plain dark chocolate candy bars!)


Chopped salted peanuts


Directions

Line a medium cookie sheet with aluminum foil. Grease well with vegetable oil. Put one layer of saltine crackers on the foil.


Melt butter in saucepan. Add brown sugar and bring to a boil. Boil for two minutes, then spoon mixture over the crackers.  


Bake at 350 degrees F/180 degrees C for five minutes. The entire surface will be bubbling evenly.

Remove from the oven and sprinkle chocolate chips or pieces evenly over the top. When the chocolate is melted, spread smooth with a knife. Sprinkle chopped nuts on top. Cool in refrigerator. When completely cool, break into pieces and serve.

**Christmas version - Use white chocolate and top with chopped peppermint candies!


Monday, November 17, 2014

Homemade Ranch Dressing

 Recently, several fellow missionary ladies have been talking about what they would request if they could request certain items to be sent to them at Christmas time. One of the most often mentioned items was for Hidden Valley Ranch packets. We too love Ranch dressing but over the years we have returned to the States for furlough and as our taste buds have changed, so has our love for packets of Hidden Valley Ranch. We now prefer the homemade recipe to the packets!
We just made this recipe up ourselves and, as a result, don't measure things out to the teaspoon. It is really important to have the right ingredients and then you can flavor it to your preference after that.


Ingredients

Mayonnaise (approx 2 cups)

Celery salt

Black pepper

Chopped dried green onion 

Milk


Directions:

Mix all but milk together initially with a wire whisk in a metal bowl. Once combined, add milk as needed to achieve desired consistency. Taste and add more ingredients until you get the flavor right. I know that sounds basic but it is really that easy! The biggest challenge is not using too much celery salt so go easy at first with that ingredient. The more black pepper the better - trust me!
Store in closed container in fridge for several days.

Now, not all missionaries have celery salt available to them so the next time you send a missionary a care package, throw in a bottle or two of celery salt from the dollar store! ;)


Tuesday, November 11, 2014

Sour Cream Chicken Enchiladas

Here we are once again talking about Mexican food! We are about to get into holiday recipe posting time but before we do I wanted to share at least one more recipe to put our flour tortilla recipe to use again. This time it's sour cream chicken enchiladas.


Ingredients

16 oz. Sour cream
1/2 pt. whipping cream (I use 20%)
2 Tbsp. Mexican green sauce (I use green Tabasco sauce) *can substitute with jalapeno pepper juice
**2 cans cream of chicken soup

**So, I am interrupting this list of ingredients, as I did with the beef enchiladas, to explain what I do when a recipe calls for cream soups or if I want to make a cheese sauce. I found this recipe years ago when my hubby and I were first married. Now, this enchilada recipe calls for cream of chicken soup. I place two bullion cubes in a small bowl and add approximately one cup of boiling hot water to them, stir them until they dissolve, and stir that broth in to the sauce mixture.

10-12 corn or flour tortillas (I have only used flour tortillas in this recipe)
4 Chicken breasts 
grated cheddar cheese (we most often use Gouda)

Directions

Boil chicken; debone (if necessary) and set aside. Mix sour cream, whipping cream, Mexican green sauce, and cream of chicken soup together in pan. Do not boil, just warm and turn off fire when heated. Pour a small amount of sauce into the bottom of a 9x13" casserole baking dish. Fill each tortilla with a small amount of chicken and grated cheese then roll up and place them seam down into the baking dish. Pour the remaining sauce over the rolled tortillas covering them entirely and top with grated cheese. Bake at 350 degrees Fahrenheit (180 Celsius) for approximately 30 minutes or until sauce is bubbling and cheese has melted evenly. 

Tuesday, November 4, 2014

White Enchiladas (Beef)

This week we are going to be using our flour tortilla recipe from last week to make white enchiladas.
These are beef enchiladas baked in a white sauce which is a little twist on traditional enchiladas.


Ingredients

1 1/2 lb. hamburger

1 package of taco seasoning
(I linked to a previous recipe posted here on the blog for homemade taco seasoning. Or, if your like me you just use several spices and quickly toss them in with the beef - garlic powder, onion powder, cumin, ground cayenne pepper, paprika, salt, black pepper.)

8 oz. of tomato sauce 
(I use tomato paste and add water until it is the consistency of tomato paste along with paprika, and a small amount of sugar to lessen the acidity)

2 cups of sour cream

**1 can of cream of chicken soup

**So, I am interrupting this list of ingredients to explain what I do when a recipe calls for cream soups or if I want to make a cheese sauce. I found this recipe years ago when my hubby and I were first married. The only thing is that now I have made it so much I just eye the ingredients but I would say for a recipe like these enchiladas, I would at least double the white sauce recipe. Now, this enchilada recipe calls for cream of chicken soup. I place two bullion cubes in a small bowl and add approximately one cup of boiling hot water to them, stir them until they dissolve, and stir that broth in to the sauce mixture. It is okay for it to be a bit thick as you will be adding milk to the soup mixture (in our case sauce mixture) anyway. 

1/3 cup of milk

grated cheddar cheese (we use Gouda)

4 oz of diced green chilies (I substitute with jalapeno peppers since they are available to us)

12-16 flour tortillas


Directions

Cook hamburger and seasonings together. This is where it is difficult to give amounts of seasonings as some like foods more spicy than others. Season per your family's preference. Drain. Mix hamburger with tomato sauce. Set mixture aside.

Combine sour cream, cream of chicken soup, and milk until blended. Pour a small amount of mixture into the bottom of a 9x13 or larger pan. Divide the meat between the tortillas and place a small amount of cheese in each. Roll up each stuffed tortilla and place it in pan, fold down. The tortillas are placed side by side, filling the entire pan. Pour the remaining mixture over the tortillas and top with diced chilies or jalapeno peppers and grated cheese. Bake at 350 degrees/180 Celsius for approximately 30 minutes or until mixture is bubbling and cheese is melted but not browned.Remove from oven and allow to stand 5 minutes.

Serve with tortilla chips and a side salad (if lettuce is cheap enough this week! ;)